Fork me on GitHub

OpenCV 笔记(三):验证码生成

说实话,我在刚接触 OpenCV 的第一天,就想着做一个验证码识别程序。这一篇呢,先讲验证码生成(因为验证码识别还不会做),毕竟生成比识别简单多了嘛!而且昨天刚刚学习了一些 Mat 的知识,生成了许多图像,那么今天就来尝试一下如何生成验证码吧!

思路

我想的生成验证码的思路非常简单,就是一张小图片,然后放一些随机的数字或字母上去,然后再加上一点噪点之类的干扰。那么关键步骤就是如何把文本放上去了。
一般遇到这种问题,我们就会去查阅文档。不过根据我多年的经验,因为我用的是 VS,我就直接先在 IDE 里敲了一下 text,果然…在弹出的提示中我就发现了一个 putText。然后我就敲下括号,就看到了这个函数声明大概长这样:

嗯..看到 renders the specified text string in the image 然后我就确定了没错!这就是我想要的函数!
接着就可以在 官方文档 找到这个函数:

1
2
3
4
5
6
7
8
9
10
void cv::putText (InputOutputArray img,
const String & text,
Point org,
int fontFace,
double fontScale,
Scalar color,
int thickness = 1,
int lineType = LINE_8,
bool bottomLeftOrigin = false
)

参数确实有点多啊,不过看完它给的参数说明,就都可以理解了:

  • img Image.
  • text Text string to be drawn.
  • org Bottom-left corner of the text string in the image.
  • fontFace Font type, see cv::HersheyFonts.
  • fontScale Font scale factor that is multiplied by the font-specific base size.
  • color Text color.
  • thickness Thickness of the lines used to draw a text.
  • lineType Line type. See the line for details.
  • bottomLeftOrigin When true, the image data origin is at the bottom-left corner. Otherwise, it is at the top-left corner.

然后我又在中文网上看到了 这个,恰好,想要的东西都齐了。RNGOpenCV 的随机数字生成器,刚好就可以用来完成我们的工作。可以在 这里 查看它的文档。我们主要用到的就是它的 uniform 函数,这个函数可以生成指定范围内分布均匀的随机数。

开始绘图

首先,我们先绘制出一张背景图,我也不确定要多大,先随便给个数。然后构造我们的随机数生成器,我发现如果构造时那个值不变,运行的时候它每次随机的还是一样的,所以就取了当前时间来构造 RNG。然后随机初始化一张背景,我把数字调大一点,是为了让背景色更亮。

1
2
3
4
5
6
7
8
9
10
11
12
13
14
15
16
17
18
19
#include <opencv2/opencv.hpp>
#include <ctime>
using namespace cv;
const int width = 150;
const int height = 100;
int main()
{
// 取当前时间来构造 RNG
std::time_t t;
t = time(NULL);
RNG rng(static_cast<int64_t>(t));
Scalar bg(rng.uniform(200,255), rng.uniform(233, 255), rng.uniform(233, 255));
Mat vcode(height, width, CV_8UC3, bg);
imshow("vcode", vcode);
waitKey();
}

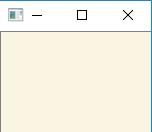
这时候我们就得到一个背景图,当然每次运行都是不一样的:

生成验证码

接着,对照着 putText 的参数,我们写一个函数 generateCode 用于生成验证码。putText 函数里需要用到文本字符串及文本颜色,这两个值也应该是随机的,于是我们先写两个辅助函数 randomTextrandomColor

1
2
3
4
5
6
7
8
9
10
11
String randomText(RNG& rng)
{
static char* text[] = {
"0","1","2","3","4","5","6","7","8","9",
"a","b","c","d","e","f","g","h","i","j","k","l","m","n",
"o","p","q","r","s","t","u","v","w","x","y","z",
"A","B","C","D","E","F","G","H","I","J","K","L","M","N",
"O","P","Q","R","S","T","U","V","W","X","y","Z"
};
return text[rng.uniform(0, 62)];
}

1
2
3
4
5
Scalar randomColor(RNG& rng)
{
int icolor = rng.uniform(1 << 16, 1 << 20);
return Scalar(icolor & 255, (icolor >> 8) & 255, (icolor >> 16) & 255);
}

我们就先假定生成的验证码中包含了四个数字或字母,用一个循环依次生成:

1
2
3
4
5
6
7
8
9
10
11
12
13
void generateCode(Mat& image, RNG& rng)
{
for (int i = 0; i < 4; i++)
{
// 生成的数字字母不断往右移
Point org;
org.x = 20 * i + 5 + rng.uniform(-3,3);
org.y = 30 + rng.uniform(-5, 5);
putText(image, randomText(rng), org, FONT_ITALIC,
rng.uniform(0.5,0.7), randomColor(rng), rng.uniform(2,3), LINE_8);
}
}

如果还不明白 putText 中参数的意义,就仔细去阅读文档。而关于 putText 里的参数是怎么来的,其实都是调出来的,一点一点试,调到满意为止 =v= 我们暂时先这样,然后在主函数里加上这个函数:

1
2
3
4
5
6
7
8
9
10
11
12
13
14
15
16
17
18
int main()
{
// 取当前时间来构造 RNG
std::time_t t;
t = time(NULL);
RNG rng(static_cast<int64_t>(t));
// 生成背景图
Scalar bg(rng.uniform(200,255), rng.uniform(233, 255), rng.uniform(233, 255));
Mat vcode(height, width, CV_8UC3, bg);
// 生成验证码
generateCode(vcode, rng);
imshow("vcode", vcode);
waitKey();
}

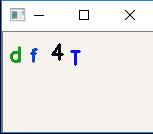
运行的效果大概是这样:

看起来挺简单吧!

加入干扰

我们看到的验证码,可不仅仅是像我们刚刚生成的那样,往往还会一些“噪点”,比如加入一些乱七八糟的点或线。我们同样也要做这个工作。我们还可以在 这里 找到很多绘制的函数,这可以帮助我们完成这项工作。
说是“噪点”,但实际上一个像素点实在是太小了,所以我使用的是一个很小的圆来代替,对应的函数是 circle,可以看 这里 的说明。

于是我们写一个 interfere 函数:

1
2
3
4
5
6
7
8
9
10
11
void interfere(Mat& image, RNG& rng)
{
// 加入圆形干扰
Point center;
for (int i = 0; i < rng.uniform(30, 50); ++i)
{
center.x = rng.uniform(0, width);
center.y = rng.uniform(0, height);
circle(image, center, rng.uniform(0,2), randomColor(rng), rng.uniform(1,3));
}
}

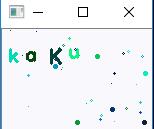
把这个函数放在 main 函数的生成验证码后面,然后运行一下,效果大概如下:

这样子看起来不够,我们还可以加入一些随机线条,我使用的是 ellipse 这个函数,它是用于生成椭圆的,我们可以用来生成一些曲线,可以在 这里 查看文档说明。
然后我们在 interfere 里加入这个部分:

1
2
3
4
5
6
7
8
9
10
11
12
13
14
15
16
17
18
19
void interfere(Mat& image, RNG& rng)
{
// 加入圆形干扰
// ...
// 加入线条干扰
Size axes;
for (int i = 0; i < rng.uniform(8, 12); ++i)
{
center.x = rng.uniform(0, width);
center.y = rng.uniform(0, height);
axes.width = rng.uniform(20, 50);
double angle = rng.uniform(0, 180);
ellipse(image, center, axes, angle,
angle - rng.uniform(0, 10), angle + rng.uniform(0, 10),
randomColor(rng), rng.uniform(0, 4));
}
}

再次运行一下,结果大概像这样:

最终效果

到这里我们基本就“完成了”我们丑陋了验证码生成,其实这是非常简陋的。我们还可以自己做更多的尝试,试试其他函数,以及调参。最终,经过再一次的修改,完整代码如下:

1
2
3
4
5
6
7
8
9
10
11
12
13
14
15
16
17
18
19
20
21
22
23
24
25
26
27
28
29
30
31
32
33
34
35
36
37
38
39
40
41
42
43
44
45
46
47
48
49
50
51
52
53
54
55
56
57
58
59
60
61
62
63
64
65
66
67
68
69
70
71
72
73
74
75
76
77
78
79
80
81
82
83
84
85
86
87
88
89
#include <opencv2/opencv.hpp>
#include <ctime>
using namespace cv;
const int width = 60;
const int height = 30;
const int code_number = 4;
String randomText(RNG& rng)
{
static char* text[] = {
"0","1","2","3","4","5","6","7","8","9",
"a","b","c","d","e","f","g","h","i","j","k","l","m","n",
"o","p","q","r","s","t","u","v","w","x","y","z",
"A","B","C","D","E","F","G","H","I","J","K","L","M","N",
"O","P","Q","R","S","T","U","V","W","X","y","Z"
};
return text[rng.uniform(0, 62)];
}
Scalar randomColor(RNG& rng)
{
int icolor = rng.uniform(1 << 16, 1 << 20);
return Scalar(icolor & 255, (icolor >> 8) & 255, (icolor >> 16) & 255);
}
// 在 image 上增加噪点
void interfere(Mat& image, RNG& rng)
{
// 加入圆形干扰
Point center;
for (int i = 0; i < rng.uniform(50, 80); ++i)
{
center.x = rng.uniform(0, width);
center.y = rng.uniform(0, height);
circle(image, center, 0, randomColor(rng), 1);
}
// 加入线条干扰
Size axes;
for (int i = 0; i < rng.uniform(10, 20); ++i)
{
center.x = rng.uniform(0, width);
center.y = rng.uniform(0, height);
axes.width = rng.uniform(20, 50);
double angle = rng.uniform(0, 180);
ellipse(image, center, axes, angle,
angle - rng.uniform(0, 10), angle + rng.uniform(0, 10),
randomColor(rng), rng.uniform(0, 2));
}
}
// 在 image 上生成验证码
void generateCode(Mat& image, RNG& rng)
{
for (int i = 0; i < code_number; i++)
{
// 生成的数字字母不断往右移
Point org;
org.x = 13 * i + 5 + rng.uniform(-2,2);
org.y = 20 + rng.uniform(-5, 5);
putText(image, randomText(rng), org, FONT_ITALIC,
rng.uniform(0.5,0.6), randomColor(rng), rng.uniform(2,3), LINE_8);
}
}
int main()
{
// 取当前时间来构造 RNG
std::time_t t;
t = time(NULL);
RNG rng(static_cast<int64_t>(t));
// 生成背景图
Scalar bg(rng.uniform(200,255), rng.uniform(233, 255), rng.uniform(233, 255));
Mat vcode(height, width, CV_8UC3, bg);
// 加入干扰
interfere(vcode, rng);
// 生成验证码
generateCode(vcode, rng);
imshow("vcode", vcode);
waitKey();
}

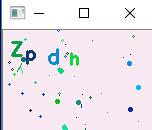
以下是生成的验证码的展示图:
1
2
3
4
还可以吧!有模有样了 ( ̄︶ ̄)↗

去研究验证码识别了 (:з」∠) ,希望下一篇文章能早日出来~

-------------------------------- 全文完 感谢您的阅读 --------------------------------
「写的那么辛苦,连一块钱都不打赏吗/(ㄒoㄒ)/~~」